
I'm actually writing today's post on Wednesday since I still have some time to kill before we can get the dang U-Haul out of our driveway. Plus I won't have my computer set up and online until late Friday and by then I'll be surrounded by boxes in our new home, furiously unpacking!
I've mentioned my friend Quinn over at Limelight Food Photography a few times on this blog. She is simply amazing! But some of us don't quite have those skills when it comes to photographing food, so I suggest you read "Taking Photos of Food -- 8 Helpful Tips" from The Pioneer Woman. All eight tips seem pretty manageable, even for an amateur like myself. The one I have to do a little more reading on is #4 relating to aperture, but I'm sure Quinn can help me understand that one a bit more!
By the way, I've also learned that using white dinnerware is a super way to make your food look extra scrumptious so I've stocked up on a set from Ikea. If only they weren't packed in a box somewhere... --Emily
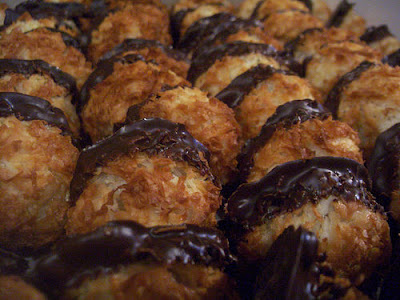
Dark chocolate-dipped macaroons
3 large egg whites
3 tablespoons sugar
1/2 teaspoon vanilla extract
1/4 teaspoon almond extract
1 pkg (7 oz) sweetened flaked coconut
8 oz. bittersweet chocolate, melted
 Heat oven to 325. Line two baking sheets with nonstick foil. Whisk egg whites, sugar and extracts in medium bowl until foamy. Stir in coconut until evenly mixed. Drop by level tablespoonfuls onto prepared baking sheets. Bake 15 to 20 minutes until set and browned. Cool on wire rack.
Once cool, dip bottoms and about 1/3 of the macaroons in melted chocolate. Tap off excess chocolate. Place on same foil-line baking sheets. Let stand at room temperature until set. Makes 2 dozen.
Image by tonx, shared via Flickr.


1 comment:
Those are really great tips! Very simple & exactly right! Will definitely help you understand aperture one of these next times we get together in detail if you want (boring). It's not as tricky as it sounds. For a point & shoot camera, use the zoom to it's full reach & then stand where you need to get the shot. That sounds backwards when I'm typing, rather than showing, but basically, the more zoom you use, the tighter the spot in focus will be in your picture & thus the more blurred your background will be. Does that help a little? I can show you what I mean... xoxo
Post a Comment